UNIHIKER K10 Lesson 7: Build a Face Recognition AI Camera for Christmas Projects

Want to add fun AI-powered holiday effects to your photos? Meet UNIHIKER K10 - a powerful upgrade to Micro:bit—and build your own smart face recognition camera! In this tutorial, you’ll learn how to capture images, detect facial features, and dynamically overlay Christmas hats, reindeer antlers, and more. No complex AI training required—just pre-built models and beginner-friendly Mind+ graphical coding. Let’s turn coding into festive creativity!

Objectives
You can use the UNIHIKER K10 to take facial photos, record the coordinates of facial features and the size of the face. At the same time, by pressing the B button, you can add appropriate Christmas stickers to decorate the photo.

Knowledge Goals
1. Master the photo capture and storage feature of the UNIHIKER K10.
2. Master the face keypoint detection feature of the UNIHIKER K10.
3. Adjust the size and coordinates of the stickers based on the actual size and coordinates of the face.
Materials List
Hardware List:


Basic Mind+ Software Usage
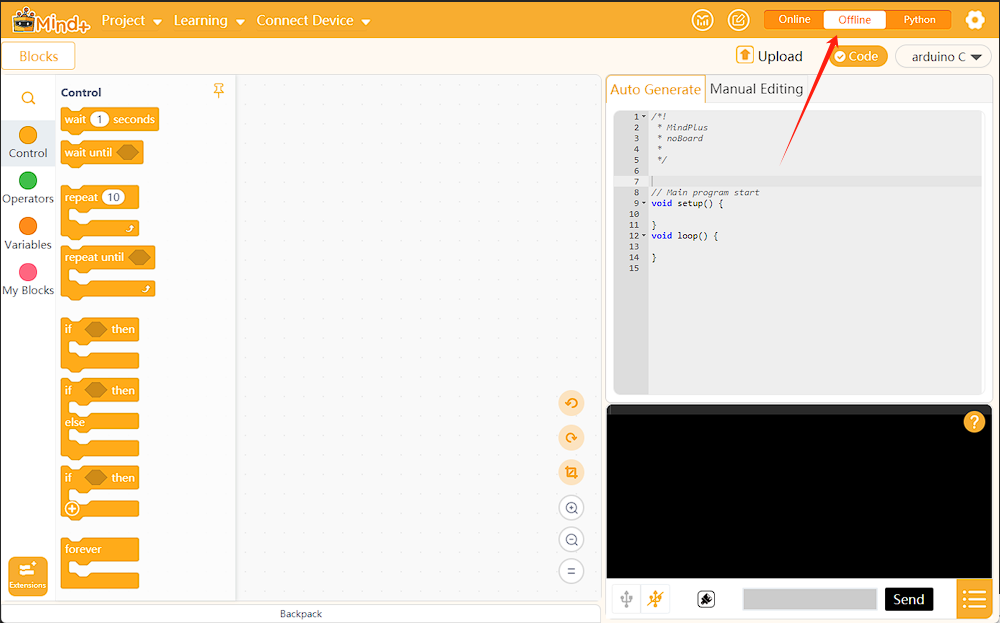
1. Open Mind+ and switch to offline mode.
2. Load UNIHIKER K10
Based on the previous steps, then click on "Extensions" find the "UNIHIKER K10" module under the "Board" and click to add it. After clicking "Back" you can find the UNIHIKER K10 in the "Command Area" and complete the loading of UNIHIKER K10.

3. Connect UNIHIKER K10
First of all, you need to use a USB cable to connect the UNIHIKER K10 to the computer.

Then, after clicking Connect Device, click COM7-UNIHIKER K10 to connect.

Note: The device name of different UNIHIKER K10 may vary, but all end with K10.
On Windows 10/11, the UNIHIKER K10 is driver-free. However, for Windows 7, manual driver installation is required: https://www.unihiker.com/wiki/K10/faq/#high-frequency-problem
Hands-on practice
Let’s dive into today’s lesson! We’ll start by learning how to capture and store photos, then move on to detecting facial keypoint data on the UNIHIKER K10 and adding Christmas decoration stickers. Ready to get started?
Task 1: Capture, Store, and Display Photos
We’ll use the face detection commands to capture a photo, store it on the TF card, and display the photo on the screen.
Task 2: Face Keypoint Detection
We’ll detect facial keypoint data, including the coordinates of facial features (eyes, nose, mouth) and the overall face size.
Task 3: Christmas Sticker Decoration
We’ll adjust the sticker coordinates based on the detected facial features and face size, so that the Christmas decorations fit perfectly on the face.
Task 1: Capture, Store, and Display Photos
1. Hardware Setup
Insert the TF card into the UNIHIKER K10 slot. Make sure the TF card is securely inserted into the designated card slot on the UNIHIKER K10.

2. Software Preparation
Make sure that Mind+ is open, the preset code appears in Python graphical mode, and the UNIHIKER K10 is successfully loaded. You can now start writing the project program.

3. Write the program
STEP1: Call the Face Detection Command
First, we need to use the "enable camera show"command to show the camera feed on the UNIHIKER K10 screen.

Note: For more details about the camera commands, please refer to the Knowledge Hub.
After turning on the camera, we locate the "switch mode face detection" command to switch the camera to face detection mode.
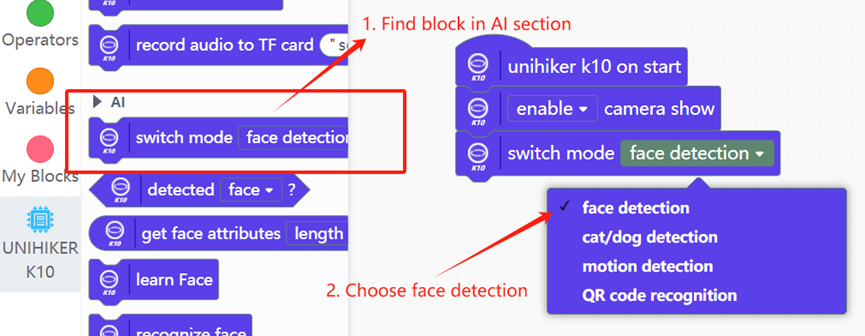
Note: For details about the face detection command, please refer to the Knowledge Hub.
STEP2: Capture, Store, and Display Photos
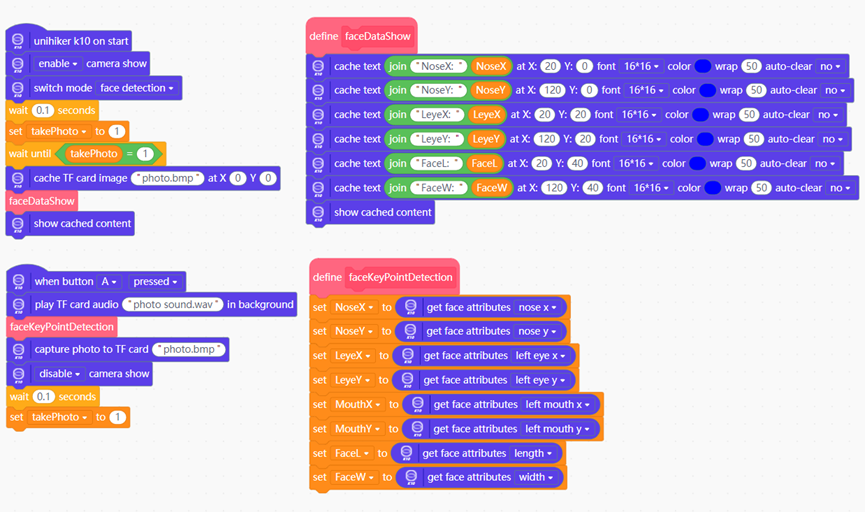
We need to use an event callback function. First, use the "When Button A Pressed" command, then the "Play TF Card Audio in Background ()" command to simulate the camera shutter sound. Next, use the "Capture and Store to TF Card ()" command to take a photo and save it to the TF card.

After taking a photo, we need to display the photo stored on the memory card. Therefore, we use a variable named "capture photo" to determine whether the photo has been successfully taken. Once the photo is taken, we turn off the camera feed and use the "cache TF card image () at X0Y0" command to show the recently captured photo on the screen.
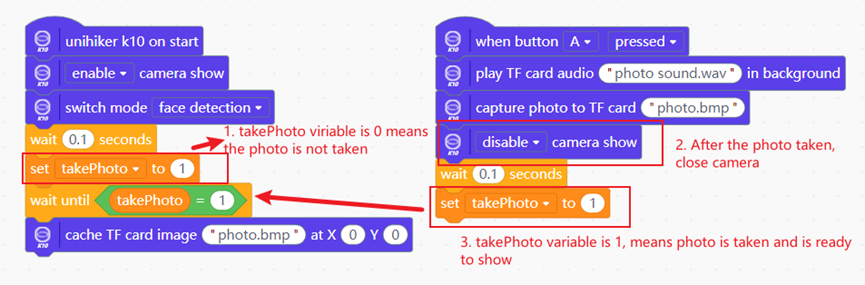
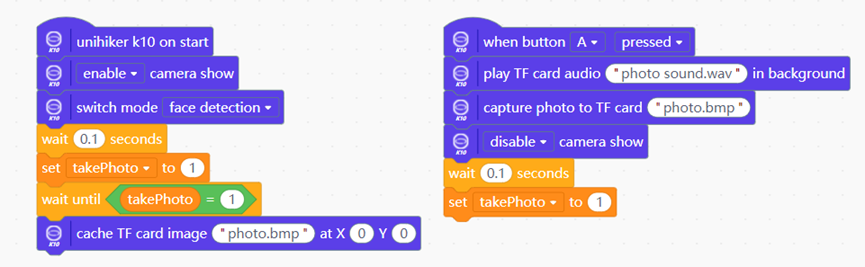
In this way, we achieve the functionality of capturing, storing photos, and displaying them on the screen. The complete code is shown in the image below:
4. Run the Program
STEP1: Check and ensure the UNIHIKER K10 is connected to Mind+. Make sure the IP address is displayed in the “Menu Bar” section, indicating that the connection is established.

STEP2: Click the “Upload” button in the upper-right corner of the interface.

STEP3: Program Execution. The camera feed will appear on the screen. When the A button is pressed, a photo will be captured and displayed on the screen, as shown in the image below:

Task 2: Face Keypoint Detection
1. Write the Program
STEP1: Obtain Face Keypoint Data
In the UNIHIKER K10, there is a command to detect face keypoints. We can use the "get face attributes" command to retrieve the coordinates of facial features and the size of the face. Additionally, we will create corresponding variables to store the face keypoint data. We will encapsulate this command into the function "Face Keypoint Detection".

Note: For details on the face keypoint data detection command, please refer to the Knowledge Hub.
To obtain the face keypoint data from the captured photo, we need to call the “face keypoint detection” function within the event callback function "when button A is pressed". This will allow us to retrieve the face keypoint data from the photo taken

STEP2: Display Face Keypoint Data
To determine the position of the Christmas stickers, we need to know the face keypoint data obtained earlier. Therefore, we need to display the face keypoint data along with the photo. In the previous step, we stored the face keypoint data in corresponding variables. Now, we can use the "cache text () on line () color ()" command to display the data, as shown in the command below:

The complete program code for the face keypoint detection module is as follows:
2. Run the Program
STEP1: Connect the UNIHIKER K10.
STEP2: Click the “Upload” button in the upper-right corner of the interface.
STEP3: Press the A button and observe the screen. You should see the face keypoint data displayed along with the photo.

Task 3: Christmas Sticker Decoration
In this task, we need to adjust the position and size of the sticker based on the facial feature coordinates and face size, so that the Christmas decorations align with the face.
1. Write the Program
STEP1: Adjust Sticker Position
Let’s take the “Reindeer Antler Sticker” as an example. We need to adjust the sticker’s position based on the face’s location. To determine the position of the face, we will use one of the previously obtained face keypoint data as a reference point. Here, we choose the "Left Eye" X and Y coordinates to determine where to place the "Reindeer Antler Sticker."

It’s important to note that in the UNIHIKER K10, the reference point for images is at the top-left corner. This means the X and Y coordinates refer to the position of the top-left corner of the image. Understanding this will help us better adjust the sticker’s position. Additionally, when the UNIHIKER K10 is in the vertical orientation, the corresponding screen coordinates are shown in the diagram below:

After adjustments, we have determined the relative X and Y coordinates for the “Reindeer Antler Sticker” based on the left eye as the reference point. The X coordinate is calculated as (Left Eye X - 45), and the Y coordinate is calculated as (Left Eye Y - 150). The program command is as follows:

STEP2: Adjust Sticker Size Based on Face Size
In actual photography, the size of the face can vary. Therefore, we cannot simply treat the sticker as a fixed-size image to place on the face. Below is an example of the same sticker applied to faces of different sizes, showing that this creates an unnatural effect.

Therefore, we need to adjust the sticker size based on different face sizes. By using the “Face Length” parameter, we can determine the size of the face. Based on face length, we will categorize the face into three size ranges: 65-85, 85-100, and 100-115. For each of these face sizes, we will use a corresponding “Reindeer Antler Sticker” with three different sizes.

We use conditional statements to display different sizes of the "Reindeer Antler Sticker" for the three different face sizes. It is important to note that the X and Y coordinates for the sticker will differ depending on the size of the face. These coordinates need to be adjusted through repeated debugging. After multiple tests, we can determine the optimal X and Y coordinates for each sticker size. The relevant program commands for this process are as follows:

To enhance the atmosphere of the photo, we need to add a Christmas border to the image. Additionally, we will set it so that when the B button is pressed, the face keypoint data is cleared from the screen, and the Christmas sticker is displayed. To improve the readability of the main program, we will integrate the sticker switching logic into a function called “Special Effects.”The program commands are as follows:

The effect diagram is as follows:

STEP3: Randomly Switch Christmas Stickers
To switch between different Christmas stickers, we first need to follow the steps from the previous task. This includes adjusting the sizes of the stickers according to different face sizes, and debugging the coordinates to make the stickers appear more natural. The relevant program code is as follows:

To randomly switch between different styles of Christmas stickers, we define a variable called "random_number". When the B button is pressed, the "random_number" will generate a value between 1 and 3, where each value corresponds to a different style of Christmas sticker. Below is the complete program code:

2. Run the Program
Click “Upload,” take a photo, and then press the B button to randomly switch between different styles of Christmas stickers. The effect is as follows.

Knowledge Hub
1. Camera commands

2. Face detection commands

3. Face keypoint data detection commands

Congratulations! You’ve built a Christmas-themed AI face recognition camera with UNIHIKER K10. Through this project, you’ve mastered image capture, coordinate calculations, and Python programming while seeing how AI can bring ideas to life.
[Get UNIHIKER K10 here]
Want to keep learning? Continue your learning journey with our other lessons.
Lesson1: Build a Light-Responsive Virtual Pet Dog
Lesson2: Design a Whack-a-Mole Arcade Game
Lesson3: Build Portable Walkman-Style Music Player (KS3/CSTA/DigComp)
Lesson4: Design Smart RFID Unmanned Supermarket
Lesson5: Build IoT Smart Greenhouse Monitoring System
Lesson6: Build a Voice-Controlled Smart Home Assistant
Lesson8: Create an AI-Powered Campus Gatekeeper with Facial Recognition
Lesson9: Create an Automatic Cat Feeder with Cat Face Detection


![[Spanish ver.] HuskyLens Cámara Inteligencia Artificial](https://dfimg.dfrobot.com/nobody/makelog/902f49d1d2eb94077e1ba7d8b652cee6_224x164.jpg)


